Installation
Introduction
This current doc will guide you to install correctly iXPath and will give more details about each present configuration.
Installation methods :
The installation can be done in 2 ways :
- Online Installation: this installation requires downloading some resources online, so it's necessary to have an internet network, then complete the installation.
- Offline Installation: this installation requires the existence of resources on a hard disk or any sources of storage (CD / USB ...), and does not require an internet network.
| Installation elements | |
| Online |
|
| Offline |
|
I - First Installation (Première installation)
A) Online Installation
The online installation uses remote resources, which makes the internet connection mandatory.

if no window displays, please make sure of the existence of the "bin" directory, that contains the java virtual machine to launch the iXPath installation.
Click on "Pemière installation", and it redirects you to the window below, which gives you the components needed to be installed.
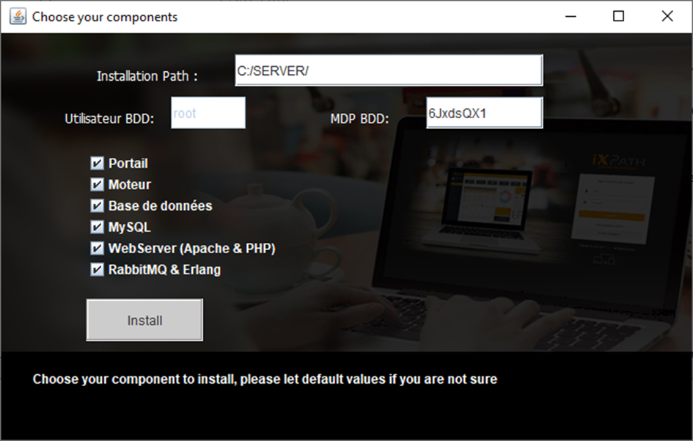
Installation components :
- Portail: frontend code of iXPath
- Moteur (Engine): backend package of iXPath code source. it will install two services: COM (running on port 8091) and Engine (running on port 8090), so please make sure to free these ports, or you can change both of them in the configuration that will be explained later in this document.
- Base de données: Script to install the database with all the newest updates.
- MySQL: Relational database management system installation.
- WebServer (Apache & PHP): Apache server and PHP installation for both "Moteur" and "Portail"
- RabbitMQ & Erlang.
if you already have the RabbitMQ component installed, uncheck it.
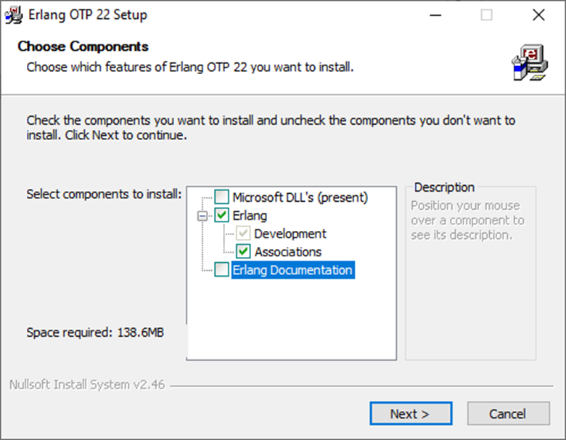
the installation begins with the broker RabbitMQ, and it uses Erlang OTP which is mandatory for its functioning.
uncheck "Erlang Documentation" as shown below :
After that, it comes the installation of RabbitMQ :
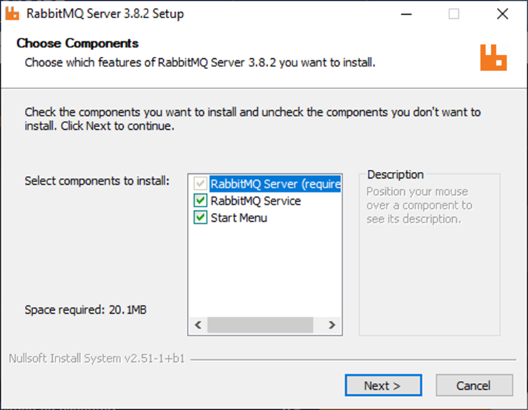
Next, continue the installation of RabbitMQ, followed by the installation of the "Moteur"/Engine.
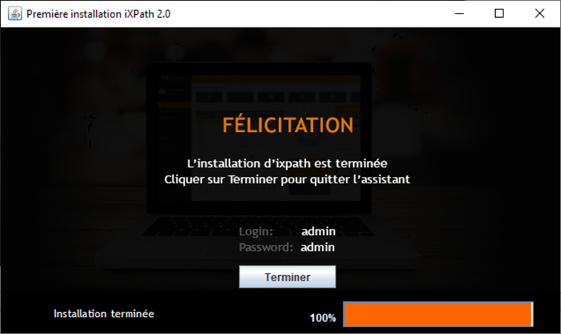
Congrats !!! you have installed iXPath successfully, and you can log in to the app on the "http://localhost" URL and use "admin" as user and "admin" as password.
B) Offline installation
As mentioned before, the offline installation does not require an internet network.
Click on the executable "ixpath.exe"
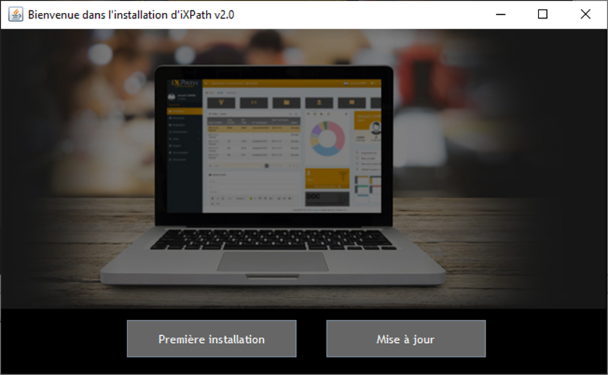
Then click on "Première installation", and will pop up this window indicating that no internet connection has been detected:
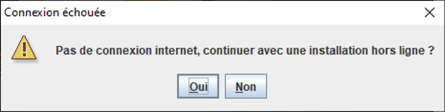
Click on "Oui"/yes.
if the "Install.zip" does not exist in the same directory as "Ixpath.exe", mention the directory where it belongs:
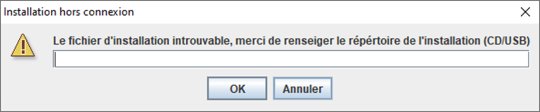
Eg: if the path is "C:/InstallationIxpath/Install.zip", you will fill in the field with "C:/InstallationIxpath/". And the Installation begins...
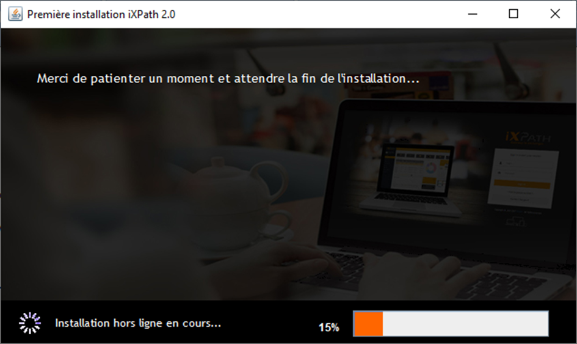
Accept the 3 Windows authorizations that will pop up during the installation. they are related to 3 components: "Database", "WebServer" and "Engine".

Congrats !!! you have installed iXPath successfully, and you can log in to the app on the "http://localhost" URL and use "admin" as user and "admin" as password.
II - Architecture of iXPath :
here is a brief presentation of the roles of each component in the iXPath app.
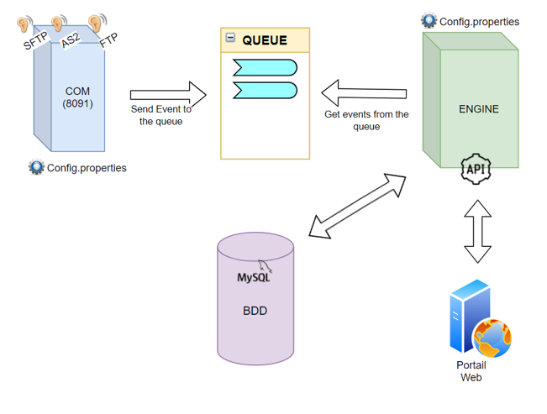
In the COM server, the service "ixpathCom.jar" can run solo or with the rabbitMQ. for accessibility reasons (Firewall...), we can install the web server inside the com server (Apache, PHP, and iXPath web).
in the engine server, the service "ixpath.jar" can run solo, we should specify in his configuration all those information: COM IP address, BDD IP address, broker IP address, and port.
See chapter VI, for more details about the remote installation.
III - Update
Updating the iXPath app or just some components goes exactly the same as the online installation, which makes the internet network necessary to fetch any updates from remote resources.
IV - Configurations & Monitoring
there are configuration files that help to maintain all needed parameters for the functioning of iXPath.
- config.properties: configuration of the Engine. here we can configure ports, directories, hosts ... it's located in /SERVER/engine/config.properties path
- config.ini: Configuration of "Portail". here we configure all parameters to connect Engine to Portail. it's located in ./SERVER/wwwroot/config/config.ini path
A) Ports
- As mentioned before, iXPath takes 8090 (Engine) and 8091 (COM) automatically as ports.
if in any case, you want to change them, go to ./SERVER/engine/ixEngine.cmd script and change them to wanted ports, then execute the script on administrator mode.
For example, we want to change the Engine port to 9090 and the COM port to 9091
and make the changes on ./SERVER/engine/config.properties :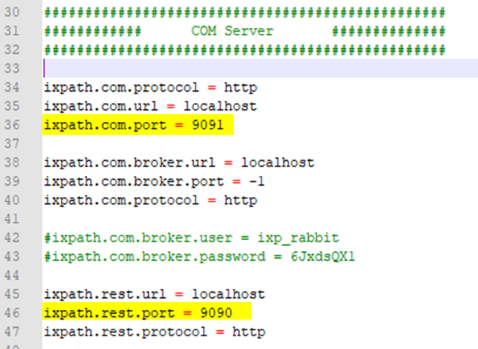
and same for ./SERVER/wwwroot/config/config.ini :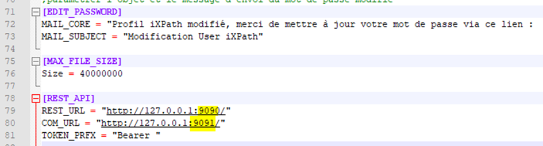
NB: 'Rest' refers to Engine service, and 'COM' refers to COM service
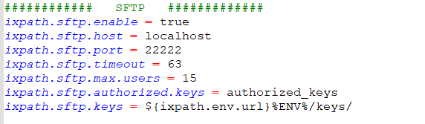
- the Engine also uses ports 22920 and 22921 for FTP and FTPS respectively
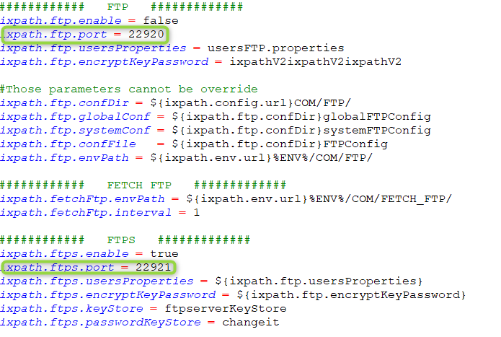
- SFTP port :
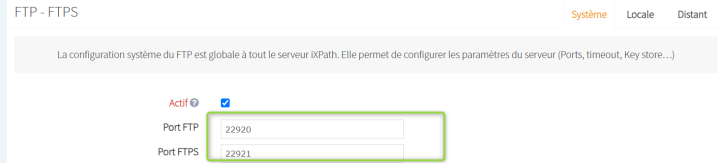
NB: You can change all these COM ports via the iXPath interface directly, by selecting the configuration target
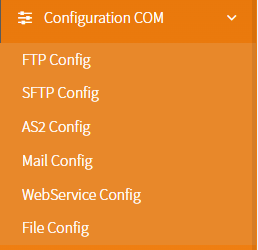
and change the port from the system configuration:
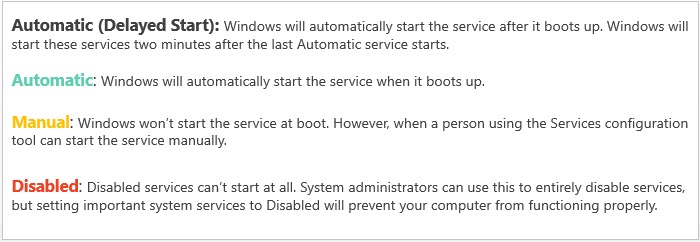
B) Services
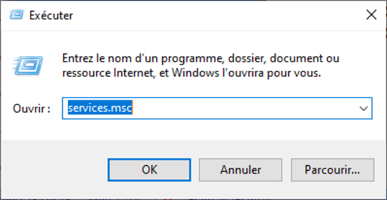
- To maintain services on your operating system, go to the search bar and type "services.msc" :
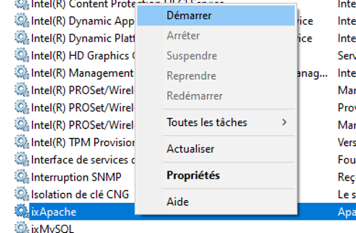
the services related to iXPath are :

![]()
here you can start, restart, pause, or stop the service target by right-clicking on it and choosing the option needed after accessing its properties:
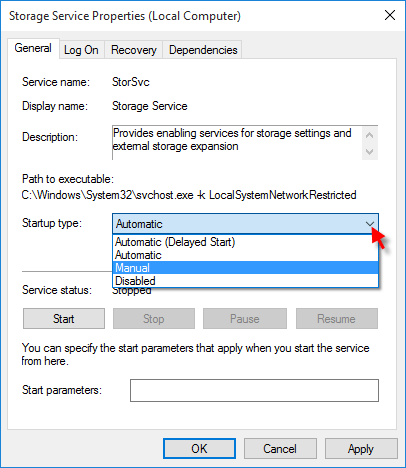
NB: all services must be running to run the iXPath app correctly.
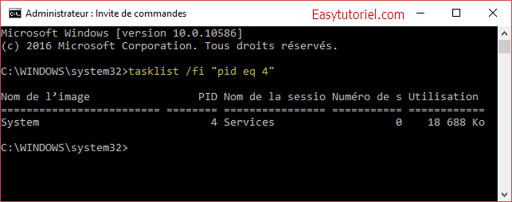
- if the Apache service cannot be on running status because of the unavailability of port 80, please follow these steps :
- open a command line and type : netstat -aon | findstr :80

- Next, you type the command: tasklist /fi "pid eq 4"
- stop and disable the following services :
- world wide web publishing service (W3SVC)
- windows activation service (WAS)
- SQL Server Reporting Services (ReportServer)
- BranchCache (PeerDistSvc)
- Network Connection Broker (NcbService)
- start apache service
- open a command line and type : netstat -aon | findstr :80
C) Logs
There are some log files to help you figure out what causes the dysfunctioning of the iXPath app, and here are all of them :
COM | PORTAL | iXPath Front Php: | .\SERVER\wwwroot\Logs |
| Portal Log: | .\SERVER\wwwroot\Logs | ||
COM | |||
| Communication Protocol | |||
| .\SERVER\Data\config\COM | |||
| Communication Protocol (AS2) Log (Example) | .\SERVER\Data\config\COM\AS2\LOGS | ||
| LogCom | |||
| .\SERVER\Engine\ (logRESTCOM.log) | |||
ENGINE | ENGINE’s Log | Source: | .\SERVER\Engine\ixpath.jar |
| LogRest: | .\SERVER\Data\LOGS\REST (logREST.log) | ||
| LogApp: | .\SERVER\Engine\ (ixpath.log ou ixpathErr.log) | ||
Process LOGS | Process LOGS | .\SERVER\Data\LOGS\ENGINE | |
BDD | DataBase | Query Log | .\SERVER\mysql\logs |
V - FAQ
- During the installation, it might happen that the directory already exists, and that will block it.
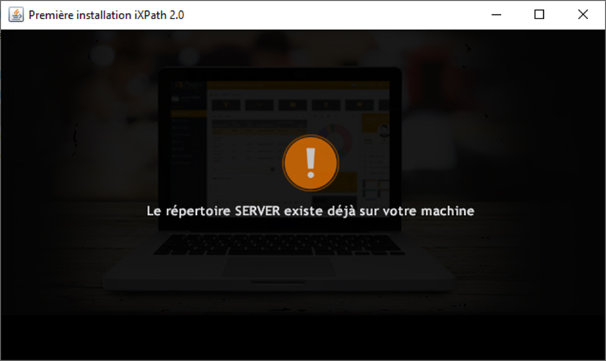
you should take action by following these steps below :- make a backup for the directory 'SERVER'.
- delete the directory 'SERVER'
- relaunch the installation.
- if you can't start RabbitMQ service,

add new environment variable named RABBITMQ_SERVER with the RabbitMQ installation Path :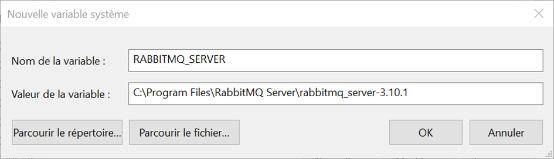
RABBITMQ_SERVER : C:\Program Files\RabbitMQ Server\rabbitmq_server-3.10.1C:\Program Files\RabbitMQ Server\rabbitmq_server-3.10.1
And now restart the RabbiMQ service.
VI - Remote installation
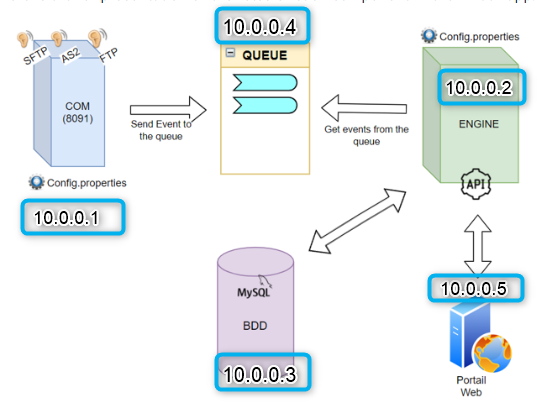
In case you want to install each service on its own server, you only need to specify all these details inside the configuration files (config.ini & config.properties (COM and Engine))
Eg: We need to implement this kind of installation.Service Host COM 10.0.0.1 Engine 10.0.0.2 MySQL 10.0.0.3 RabbitMQ 10.0.0.4 Portal 10.0.0.5 That can be designed as architecture below :
1 - Installation
On each server, install the service in question :
We start with the database
then the broker RabbitMQ: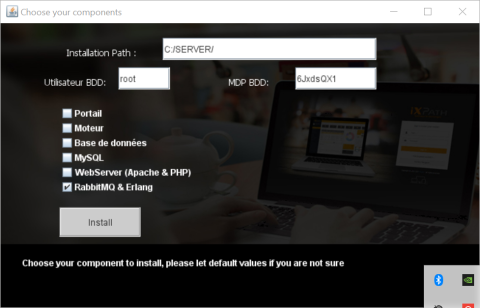
next, for each COM and Engine services, we do the same installation, it will install for both servers, and you disable the undesired service.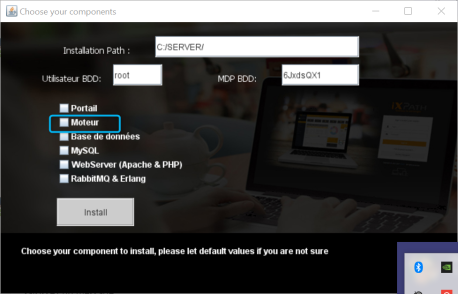
for example, if we're installing COM in 10.0.0.1, we disable the engine service
(Same for Engine)Finally, install the portal in 10.0.0.5

2 - The next step will concern the configuration
On 10.0.0.1 (COM server)
Inside config.properties, identify all hosts that COM can communicate with.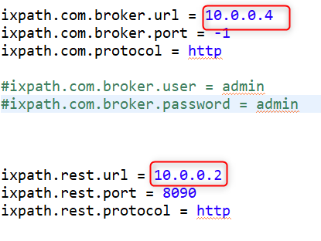

On 10.0.0.2 (Engine server)
we make the same modifications, and we identify the COM host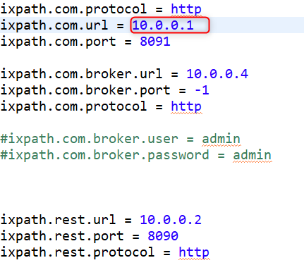
On 10.0.0.5 (Portal server)
Set the config.ini file.

Note :
We can install iXPath in just two or 3 servers, the combination of services that we recommend :
- COM with the rabbitMQ and Portal
- Engine
- BDD